“I bought expensive equipment, but my videos still look amateur.”
“People keep commenting that they can’t hear me properly.”
“Do I really need to spend thousands on gear to start?”
Stop right there.
I’ve seen creators with iPhone cameras get millions of views.
I’ve also seen creators with $5000 setups get 50 views.
The difference isn’t the gear.
It’s knowing what actually matters.
The Brutal Truth About Recording Quality
People judge your video in the first 3 seconds.
And 90% of that judgment is based on audio quality.
Not your camera. Not your lighting. Your audio.
Why?
Bad video with good audio = watchable. Good video with bad audio = unwatchable
Your brain can forgive blurry footage.
It cannot forgive audio that makes it work harder to understand you.
The Audio Setup That Actually Matters
The Room (More Important Than Your Mic)
Echo = Death
- Empty rooms reflect sound everywhere
- Makes you sound like you’re in a bathroom
- Even expensive mics can’t fix bad room acoustics
Echo Solutions:
- Fill your room with stuff (furniture, clothes, books)
- Record in your closet (seriously, it works)
- Hang blankets on walls
- Use acoustic panels if you’re fancy
Background Noise = Distraction
- Cars, ACs, neighbors, construction
- Viewers will click away rather than strain to listen
Noise Solutions:
- Record at 5 AM or 11 PM (the world is quieter)
- Close all windows and doors
- Turn off fans and ACs during recording
- Pick the quietest room in your house
The Microphone Reality Check
You don’t need a $500 mic to start.
Budget Option: Your phone’s mic can work if:
- You’re close to it (6-8 inches)
- The room has no echo
- No background noise
- You speak clearly
Upgrade Option: Boya M1 ($20-30)
- Massive improvement over phone mic
- Works with phones and cameras
- Best bang for your buck
Professional Option: Audio-Technica ATR2100x-USB ($79)
- XLR and USB connectivity
- Studio-quality sound
- Future-proof investment
The Device Setup Nobody Teaches
Keep Your Recording Device STABLE
What most people do: Hold the phone in their hand while recording.
Result: Voice levels constantly change as distance varies.
What smart creators do:
- Prop phone on the shelf or table
- Keep a consistent distance from the mic
- Use a tripod or a phone stand
- Never hold the device while recording
The ‘Phook’ Sound Problem
Those annoying air puffs on ‘P’ and ‘S’ sounds?
Quick Fixes:
- Tilt the phone/mic so it’s below your mouth, not directly in front
- Use a sock as a cheap pop filter (yes, really)
- Speak slightly off-axis from the mic
- Buy a proper pop filter for $10
The Posture and Voice Technique Game-Changer
Stand While Recording
Sitting = Compressed chest = Muffled voice Standing = Open chest = Clear, powerful voice
The difference is night and day.
Voice Quality Hacks:
Record Right After Waking Up
- Voice is naturally deeper and crisper
- Less vocal strain from daily talking
Record Before Eating
- An empty stomach = a clearer voice
- Full stomach = nasal, congested sound
Stay Hydrated
- Sip water between takes
- Prevents dry throat crackling
- Maintains energy levels
The Communication Style That Keeps People Watching
Natural Pace (Not Too Slow, Not Too Fast)
Test: Imagine explaining something to your friend sitting next to you.
That’s your natural pace.
Emphasis Technique (This Is Huge)
Wrong way: SHOUTING important words
Right way:
- Pause before keywords
- Stretch important words slightly
- Lower your voice for impact
“This technique… will change everything.”
Emotion Injection
Monotone voice = Instant click-away
Varied tone = Binge-worthy content
Read your script like you’re telling an exciting story to someone you care about.
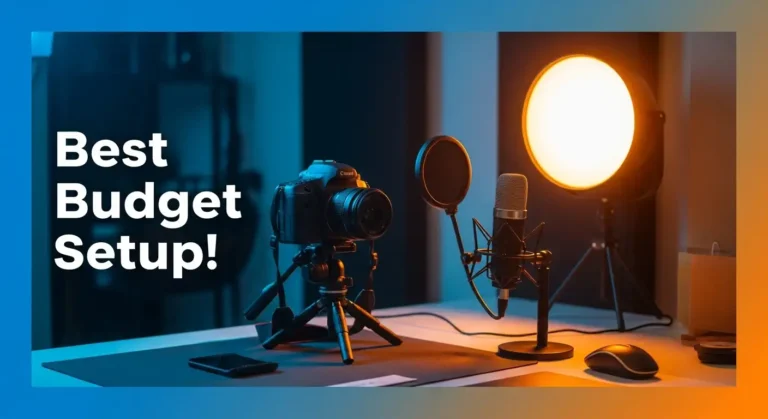
The Budget-Friendly Complete Setup
Total Cost: Under $100
Audio:
- Boya M1 microphone ($25)
- Pop filter/sock (Free)
- Quiet room setup (Free)
Video (If Needed):
- Phone camera (You already have it)
- Natural window light (Free)
- Tripod or phone stand ($15)
Background:
- Clean wall (Free)
- Simple backdrop ($20)
- Good lighting position (Free)
The Audio Editing Essentials
Use CapCut for beginners (Free)
Essential Effects:
- Normalize: Levels out volume inconsistencies
- Noise Reduction: Removes background hum (use sparingly)
- EQ: Boost clarity, reduce muddiness
- Amplify: Increase overall volume if needed
Pro Tip: Adobe Podcast Enhance (Free)
- Upload your raw audio
- AI makes it sound professional
- One-click solution for beginners
The Lighting That Doesn’t Break the Bank
Natural Light = Best Light
Setup:
- Face a window (not with a window behind you)
- Record during “golden hours” (morning or late afternoon)
- Use a white wall as a natural reflector
Artificial Light (If Needed):
- Ring light ($30) or desk lamp with white bulb
- Position at eye level, slightly above
- Avoid harsh shadows under the eyes
Recording Mistakes That Scream Amateur
Mistake 1: Recording in an echoey bathroom/empty room
Fix: Find or create an acoustically treated space
Mistake 2: Inconsistent distance from the microphone
Fix: Mark your position, stay put
Mistake 3: Not doing test recordings
Fix: Record 30 seconds, listen back, adjust
Mistake 4: Recording when tired or after meals
Fix: Schedule recording when your voice is fresh
Mistake 5: Ignoring background noise “because editing will fix it.”
Fix: Get it right during recording
The Professional Mindset Shift
Amateur mindset: “I’ll buy better gear when I get more views.”
Professional mindset: “I’ll maximize what I have now and upgrade strategically.”
The truth:
Good audio + decent video shot on phone > Bad audio + expensive camera footage
Master your current setup before upgrading.
The Bottom Line
Recording quality isn’t about expensive gear.
It’s about understanding what makes content listenable and watchable.
Audio quality determines if people stay. Video quality determines if they subscribe.
Get audio right first. Everything else is secondary.
Next up: Video editing basics – because raw footage, no matter how well recorded, needs the magic of editing to become binge-worthy content.